Hunting QRM: An example of a systematic approach
By Chuck Chandler, WS1L and Steven Storie, K1SPS
For many amateurs, the electromagnetic spectrum is a valuable resource that we are allowed to use in our hobby. Of particular value is the HF spectrum from 3 to 30 MHz, as these bands support worldwide communications through ionospheric propagation. But what do you do if your HF spectrum is unusable due to a high noise level? Well, you approach it in a systematic method designed to locate and mitigate the problem. Recently one of our members had this problem, and this article explains how we solved it.
Last fall Steven, K1SPS, mentioned that he was unable to operate much on HF due to a very high local noise level, with his radio showing S9 to even S9 + 20 dB of noise on all HF bands. That amount of noise, over that wide a spectrum, is rather unusual. When he mentioned it again at our March club gathering, I offered to stop by with some gear to trace the source. A few days later he was available so I drove to Pittsfield.
I had checked the internet for local AM radio stations and was listening to them as I approached Steven’s QTH. One of the possible sources was a serious defect in the electrical distribution system in his neighborhood. If that was the case, it would be very obvious given the amount of power required to create that much noise. However, it would mean dealing with a large utility to solve the problem.
Fortunately, the AM radio stations were coming in loud and clear as I drove around his neighborhood for a few minutes. It wasn’t until I pulled into the driveway next to his house that I began to hear noise on their signals. A few minutes checking the outside of the house using a small receiver and a loop antenna showed some noise when very close to the electrical boxes on the side of the building but nothing very strong. I set up a 20-meter ham stick on the roof of the jeep and turned on my KX3/PX3 combo to check the noise level.
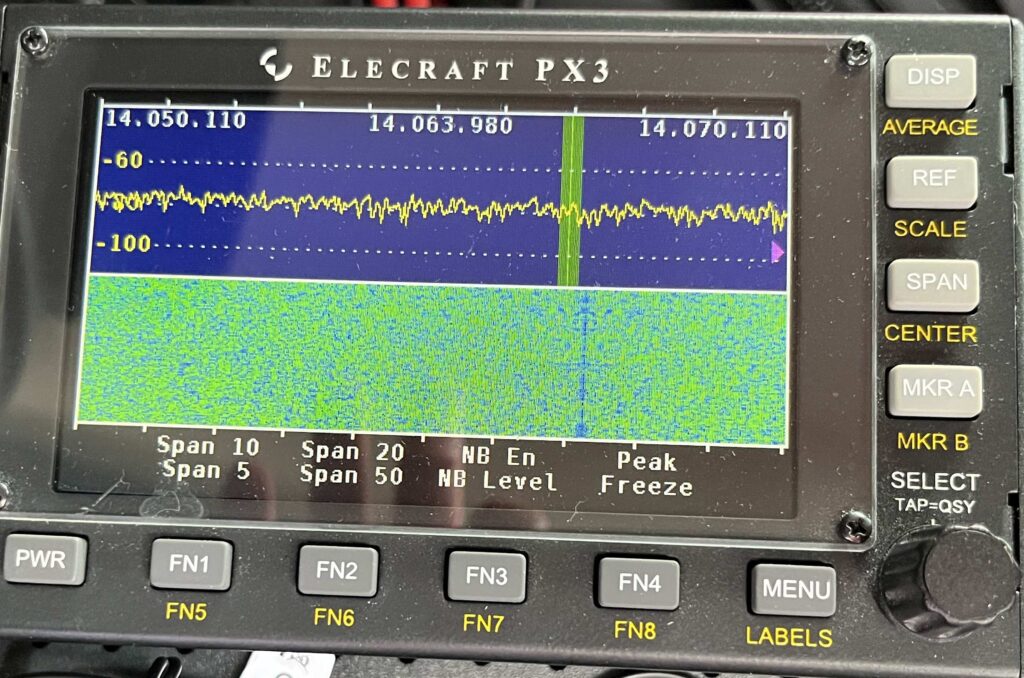
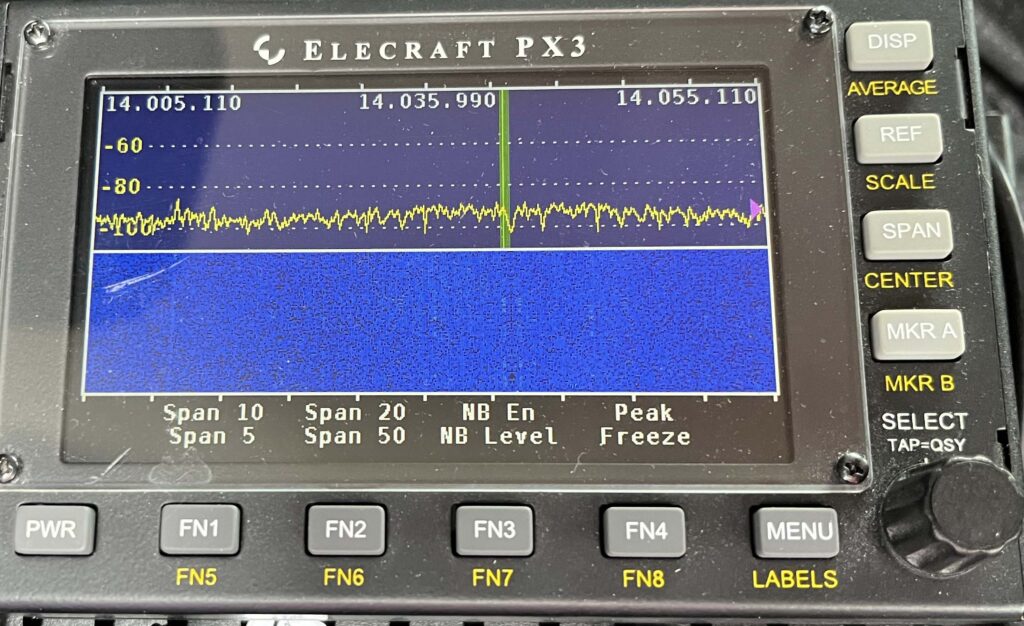
(Photo 1: The QRM Steven was experiencing)
The PX3 Scope showed a noise level of about -75 dBm, a very high level. In Photo 1 you can see a single vertical trace of a very strong CW signal that is the only one getting through the noise. This was an encouraging sign, as a stronger noise source is likely to be very evident when it is mitigated.
The first step was to begin to remove potential sources of noise. Steven shut down his home solar power array, which did not help at all. After that, he turned off the master breaker to shut down all power to his home. The noise remained, which was somewhat disheartening at first. Even worse than dealing with a large utility could be trying to convince an uncooperative neighbor to fix or replace something!
However, Steven mentioned that he had several Uninterruptible Power Supplies in the home powering various computer and networking devices, and he proceeded to shut them down. It didn’t take very long before the interfering noise disappeared.
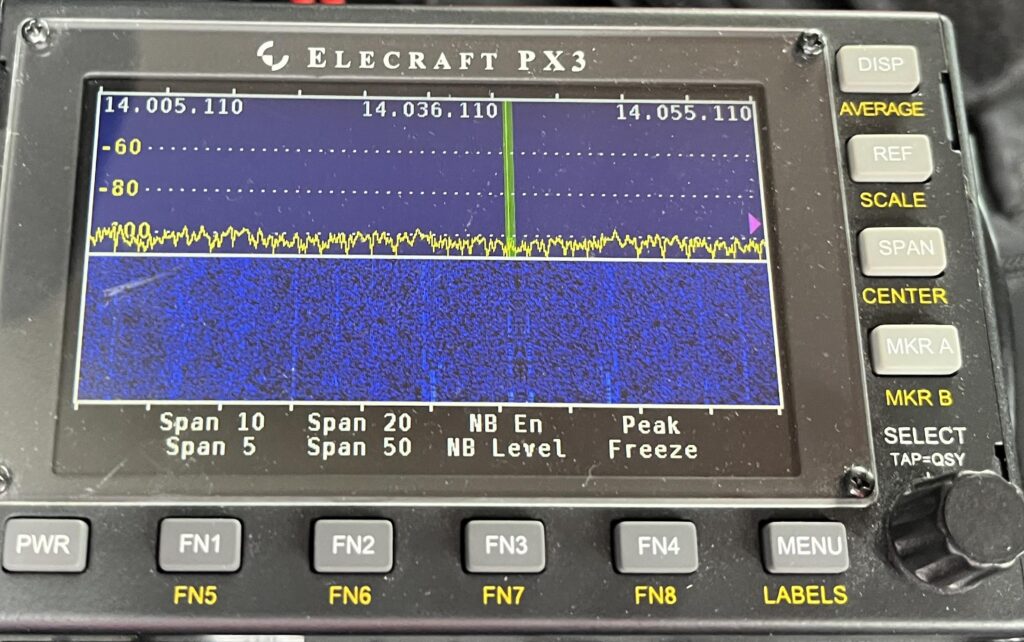
(Photo 2: The noise floor with all electrical devices powered down)
At this point the noise level is somewhere around -105 dBm, a roughly 30 dB decrease. This equates to 1/1000th of the original noise level. The scope shows a multitude of CW signals that are now audible above the noise. This was definitive proof that the noise source was inside the house, which meant that Steven could mitigate it himself without having to convince anyone else to cooperate.
At this point we began to power up devices one by one. I could see the noise floor creep up a bit, and the distinctive snake-like signatures of switch-mode power supplies appeared on the scope.
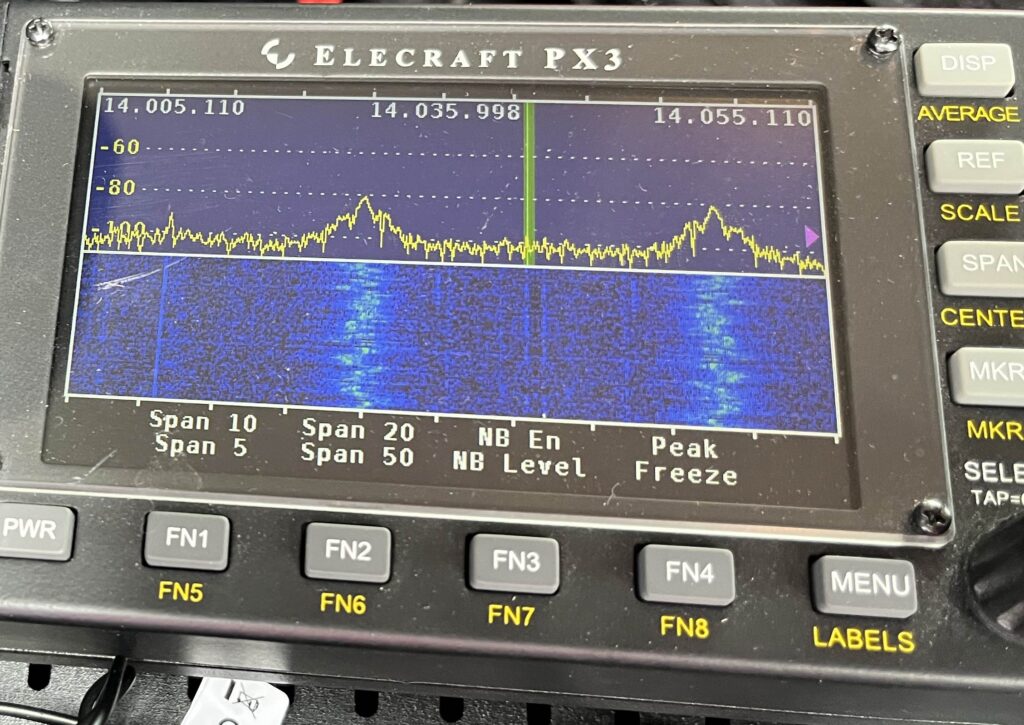
(Photo 3: As we began to restore power to some devices)
In Photo 3 you can see the noise floor has risen to about -100 dBm, and some SMPS are beginning to power up. It did not take very long to identify the culprit. When Steven powered up one device the noise came back.
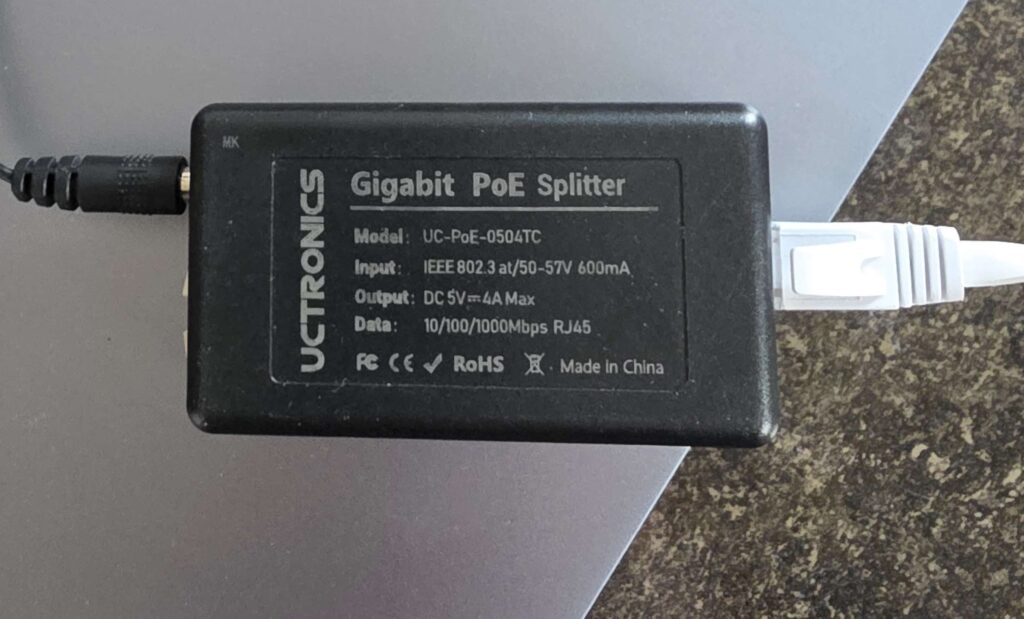
(Photo 4: The cause of all this bother)
The box in Photo 4 is a Power Over Ethernet injector. It allows for a remote device to draw power from the same ethernet cable it uses for data. These are commonly used so that only one cable needs to be run into awkward places. This box was in the attic, a few feet away from the feedpoint to Steven’s HF antenna, an end-fed wire. He was able to replace it with a dedicated plug-in power supply, and the device powered up with no noise.
Eventually everything was powered back up. The result was quite a difference from Photo 1.
(Photo 5: The end result)
As you can see in Photo 5, the noise level is now around -95 dBm, still 20 dB down. Ninety-nine percent of the noise is now gone and vertical signal traces can be seen. We moved inside to Steven’s shack and confirmed that his HF radio was now seeing a noise level of about 1-2 S units on CW, and 4-5 S units on SSB. This is a reasonable noise level that should allow him to enjoy the HF bands again.
While Steven certainly could have fixed this problem on his own, having one person watch the band scope while the other turns power on and off as needed is much more efficient and reduces the need to go back and forth, up and down stairs, etc.
In practical terms, this is result is just about as good as it can be. Steven did see that his network server adds a noticeable amount of noise, but that device has lots of cables that can be replaced or have chokes added. With a noise level of S 4-5 on SSB, he may be able to reduce that by one or perhaps two S units at best. The law of diminishing returns does set in when hunting noise sources. Interestingly enough, Steven had a second one of the POE injectors in his shack, but being much further away from the antenna feedpoint it did not create any noticeable noise. An end-fed antenna often has the feedpoint at the home, placing it closer to noise sources than dipoles or yagis where the feedpoint can be located at a distance.
This was an excellent example of locating and mitigating a serious noise source that was impacting the entire HF spectrum. If you find yourself with so much noise that you have trouble hearing stations, a systematic approach is very worthwhile.
How-to Guide for locating and mitigating interference:
- Find a battery source to run your radio.
- Record the noise level on a few bands of interest. A scope is a great aid here.
- Shut down power to your home at the main breaker. If the noise disappears you can skip the next step.
- Shut down any UPS-powered devices, then shut down the UPS devices themselves.
If the noise is still there, it is external to your control. If it is now gone, turn on the UPS one at a time, then the UPS-powered devices one at a time, checking between each device to see what difference it makes. This is where a second person comes in handy to reduce the time and effort spent going back and forth.
Once the UPS-powered devices are back on line, turn back on the master breaker to the house. If the noise then reappears use individual breakers to isolate one circuit at a time until you find the circuit that is powering the noise source. Then go into that room and unplug devices one at a time until the guilty party is identified.
Hopefully you will never need this, but if you do suffer from a high noise level, this is a proven method of fixing the problem. Remember, there are a lot of experienced fellow amateurs in our club, and we can always be counted on to help out when needed.